GSM caller alarm
Introduction
Do you have a cell phone laying to your drawer and you want to throw it away because you think it's useless to you??? WELL DONT!!!
In this project i will present you a really simple GSM CALLER ALARM.
This project can be very handy, since you can have call notification to your phone or your
cell phone when the application that was installed has triggered the input of the GSM CALLER ALARM and made the call to you.
It is a very cheap solution because the complete project cost me 6 euros including the box and in addition to the simplicity of the circuit makes it an affordable and
easy building constructional project.
GSM caller alarm photos
 |
 |
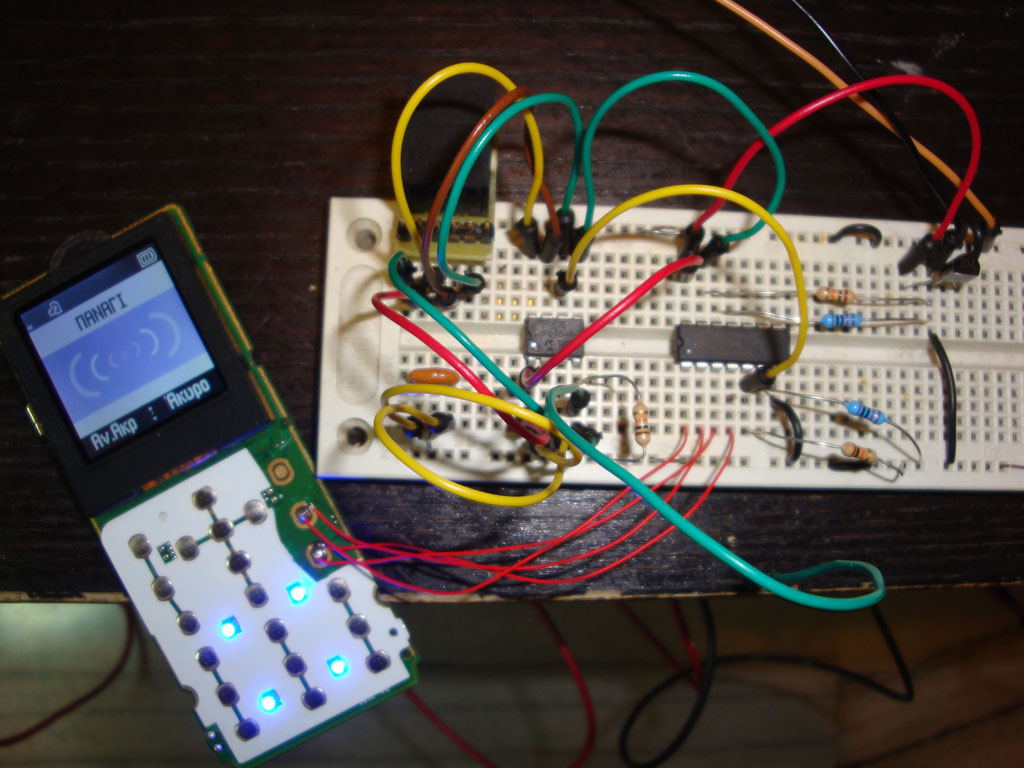 |
| Circuit in stand-by mode. | Just activated... | Making a call...!!! |
Schematic Diagram

*NOTE
In my schematic you will notice that i have used a ceramic resonator instead of the pic's internal oscillator.
And that's because
i accidentally erased the internal osccal value of the pic... :-( .
If you use pickit programmer (I use pickit3) there is an option box
in the settings tab of MPLAB where you
can tick it in order to prevent osccal overwriting.
There is a good explainatory article
in Peter's website where he says how you can recalibrate the factory osccal value....
Circuit Overview
As i said above the circuit is really simple.The heart of the circuit is a pic microcontroller 12f675 which does all the job in corporation with a quad cmos bilateral switch (cd4066) for the interface with the cell phone.
The cd4066 acts like our fingers when we press a button.
So when the input of the pic has been triggered, the pic sets high one output to activate the cell phone.
Then with an appropriate delay ,the pic gives time to the cell phone start-up and then again the pic activates the second output to accomplish a "Fast call".
Apart these two Ic's, pull down resistors are placed to the inputs of the cd4066.
Also i have used a pinout header to the input of the pic so you will have the option to change the polarity of the input according to your needs.
(Except hardware, software changes must be made. Further info below...)
Downloads

Calibration
Well i think its now time to calibrate the circuit according to our needs.
The first parameter to the calibration procedure is to see what polarity output has the application that is going to be placed. For example...
If the output of the "alarm" is negative, then you must place the jumper between common and +5 pins.
If the output of the "alarm" is positive, then you must place the jumper between common and GND pins.
Thats for the Hardware....
Now as for the software you must locate the instruction BTFSC GPIO,3 and change the last letter from
C to S........BTFSS --> for those who expect positive input.
S to C........BTFSC --> for those who expect negative input.
The second parameter is the delays...
I have used an old Alcatel OT-209 cell phone.So the delays in my programm is according to this cell phone.
If you possess a different phone, then you will have to make a test first to see how much time is needed
to start-up, to locate a network and finally how much time is needed for a key to be pressed to achive a "Fast call".
When you will have done the test, you will have the time for each step that the cell phone needs.
In my programms i use comments.... Search for the three instruction lines:
call wait1sec ; start-up phone
call wait15sec ; delay until network ready
call wait2sec ; fast call
Τhen you can simply change the the number of call Wait1Sec instruction between 1 to 20 (reffering to seconds).
Conclusion - Considerations
At last there is another thing that we didn't discuss...
As you will see to my schematic i have used an LM317 to supply 4V my cell phone instead of having it's own battery.
If your phone's battery has different output voltage, then you must change the 2 resistors according to this formula
VOUT= 1.25V(1+ R4/R5) + IADJ(R4)
or if you are bored of making calculations you can use an online calulator Here
Also i must admit that this project is not the best, since there are GSM modules where you can control them thru AT Commands and in a very low prices.
Perhaps a new version of GSM caller alarm may come to the future...